A cat collar has different functions.
What does a person think about when he hears the word “collar”? Of course, about the dog. It is unlikely that, for example, the image of a Scottish fold cat, decorously walking around the apartment with a leather accessory around its neck, which also rings, appears in your head.
The article tells you what types of neck straps there are, which ones you can’t make yourself, and which ones you can. You will also learn how to accustom your cat to the accessory.
Master class on making an accessory
Like any handicraft, making a collar is a very exciting and interesting activity. We offer you a simple and easy process that will not take much of your time.
- First of all, choose the right fabric. It can be any color you like, but the main condition is that it must be dense.
- Prepare a fastener that is easy to use (we discussed their options above), a needle and thread. To decorate the collar, you can take beautiful stones, beads or beads, preferably the same size.
- Measure the volume of the cat's neck with a centimeter. From the selected material, cut a narrow strip, no more than 2 cm.
- Glue or sew pebbles onto the prepared base so that the distance between them is the same. Carefully attach the clasp so that the collar can be easily removed and put on at any time.
When choosing fabric for a collar, pay attention to the density of the material
Using this template, you can easily make a collar of any kind, giving free rein to your imagination. The main thing is to remember a few simple rules:
- Do not use very heavy jewelry. It will be uncomfortable for the cat to walk in a collar that bends it to the ground. It is better to decorate the product with fewer stones or beads.
- If you want to decorate the collar with ribbons, secure them so that they do not interfere with the cat's walking. Carefully secure the tape on all sides, otherwise it may unravel, blocking the cat's view, or, worse, get caught on something.
- When choosing material for a collar, pay close attention to its composition. Some types of fabrics can cause allergies in both humans and cats. Leather is considered the optimal material for a collar.
Tip: To find out if your pet is allergic to fabric, place the selected material near the cat for a while. If the animal does not react for a long time, you can use this fabric to make a collar with your own hands.
Corrugated cardboard house
The idea of creating such a house came to the minds of the inventive Japanese. There are no difficulties in making a home for a pet and it will please cats of any temperament. The house looks like a beehive due to the combination of raised cardboard lines. The craft can be given different shapes. The most popular are spherical shapes. The ribbed structure of this type of cardboard will allow the cat to sharpen its claws at the right time.
You will need:
- Cardboard;
- PVA glue;
- soft bedding.
Manufacturing instructions:
You need to cut circles out of corrugated cardboard. The size of the circles must follow the bending lines of the future house. Then the elements are glued together with ordinary office glue. For the comfort of your pet, it is advisable to lay a pillow inside the ball.
Plywood house
It is possible to build a house from plywood. You need to prepare the necessary material and carefully carry out all stages of the work, following the step-by-step instructions for creating a house yourself.
You will need:
- Fastening tool;
- carpet;
- beam;
- rope;
- sandpaper.
Construction method:
The house model consists of a lift and a miniature booth. Elements of the house are cut out of a piece of plywood - the roof, a small ramp and walls. Be sure to sand the edges of plywood elements. Then, using staples, the parts of the house are covered with fabric and fastened.
The base mounted to the booth must be slightly wider than the main structure for making the ladder. The legs are attached to the base. A shelf is attached from above to a beam wrapped with rope using a tool.
You can look at pets endlessly. We must love them and create comfortable living conditions.,
Making a harness for a cat with your own hands
You can make a harness for your pet yourself. To do this, you will need a nylon or cotton tape 1–1.5 cm wide. First, take three measurements from your pet:
- girth of the chest behind the front legs (B);
- cervical girth (A);
- the distance along the back from the base of the neck to the place where the chest circumference was measured (C).
The easiest way to make an H-shaped harness
Step-by-step instructions for the process of making an H-type harness:
- We cut a piece from the tape according to measurement C for the jumper with a margin of 2 cm at both ends.
- At the ends of the jumper we bend the tape and make loops for the subsequent placement of the main retaining loops.
- We are preparing a strap for the chest according to measurement B. It is necessary to provide a fastener at its ends. It is best to use plastic locks. Velcro fasteners are not recommended, as they do not provide the required level of reliability.
- The neck strap for measurement A is made using the same technology.
- The prepared jumper is threaded through a metal ring to connect the leash. You can sew the ring tightly to the belt.
- The neck and chest straps are inserted into the loops on the jumper.
This is what the finished product looks like
The finished product is very similar to the letter "H". The length of the straps is adjusted to the size of the pet.
You can sew other harness designs.
You can sew a restraint device from any fabric like a harness-vest
How to discourage a cat from sharpening its claws in a “forbidden” place
| First of all, a certain smell will help. Animals have a more highly developed sense of smell and some aromas are categorically unpleasant to them. The smell of alcohol, for example, or perfume.
Cats don't like the smell of all citrus fruits. You can purchase a special spray based on aromatic oils at the pet store. All rights reserved.
| Usually animals quickly abandon places where they are supposed to be in danger. A loud bang, a stern hail, and wrapping furniture in cellophane are also effective.
Many people recommend “water procedures” from a spray bottle, but this is possible if a cat is somewhere nearby trying to sharpen its claws, and the owner is sitting fully armed, waiting for her. Everyone can invent the ability to dare an animal themselves, knowing all its pros and cons.
.
Wearing rules
Several conditions for wearing the structure must be observed:
- Heavy and voluminous collars should not be worn, as this will limit the animal’s movements too much.
- The size must be appropriate for the pet, for example, for a small kitten you need to buy or make a suitable cone.
- Cover sharp edges with electrical tape, adhesive tape, or tape, otherwise the cat may get hurt.
- Do not let your pet outside, it is unsafe.
- Make sure that the animal can easily reach the bowl of food and drink.
- If the pet refuses to eat, feed it by removing the collar.
- Inspect the skin under the collar while wearing it.
- Brush your pet, because because of the barrier he cannot groom himself.
- Provide free living space.
- Isolate from other animals.
- Wear until recovery, when the wound has completely healed and the veterinarian allows you to get rid of the collar.
You should put on the collar carefully, without making sudden movements; it is better to do this together
Useful tips
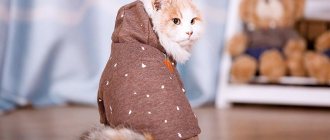
- Cats are more timid, more active and flexible than dogs. If you plan to walk your pet on a leash, buy or sew a harness. It secures the animal’s body well and leaves little chance for escape. You will also have to gradually accustom your pet to a harness.
- Do not delay in training your kitten to use a collar or harness. The older the animal, the more difficult it is to accustom it to foreign objects on its body.
If the cat comes into the family as an adult, you will have to be patient. Perhaps he will agree to wear only an anti-parasitic collar. The harness and leash will remain gathering dust in the closet.
- A cat over 10 years old will prefer a long nap to a walk on a leash.
- Objects on the animal's body can cause allergies. At the first signs, immediately remove the accessory and consult a doctor.
Cats are independent creatures. No matter how much the owner would like to take a morning or evening promenade with his beloved pet on a leash, perhaps this will remain a dream. Or the animal will turn out to be a minimalist - no collars or harnesses. Only impeccably licked wool.
Making an Elizabethan collar for cats with your own hands
If you don’t have the opportunity to visit a pet store, and you need a protective cone yesterday, make it yourself. This does not require special talent, so anyone can cope with the task. You just need to follow the instructions, which explain in detail how to make a collar for cats with your own hands from cardboard, a plastic bottle and other materials that are at hand.
Made from cardboard - disposable
A disposable collar is suitable for the anti-flea procedure - to prevent the cat from scratching or licking the product. It is also useful for one-time manipulations. The maximum period for wearing a cardboard accessory is 3 days.
What you will need for production:
- 2 sheets of A4 cardboard;
- ruler;
- a compass or round object - for example, a jar lid;
- marker, pencil or pen;
- scotch;
- scissors.
The whole job will take no more than 5 minutes.
Step 1.
Prepare all the tools. Find the middle on the long side of the cardboard sheet.
Step 2.
Starting from the found middle, draw a semicircle using a lid or compass. The radius for a medium-sized cat will be 6 cm, but after trying on everything will be adjusted.
Step back about 10 cm from the inner semicircle and draw an outer semicircle.
Step 3.
Cut out the workpiece - it turns out to be ½ circle. Now, placing it on the second sheet of cardboard, outline and cut out ¼ of a circle.
Step 4.
Connect the cut with tape. You should have ¾ of a circle - that is, a full collar.
Step 5.
Try the collar on the animal. If it’s too tight, move it a little away from the inner radius. Do not start with large numbers - often it is enough to step back from the edge by 0.5 cm.
Step 6.
Place the accessory on the animal and secure with tape.
Made from plastic - reusable
You can make a plastic protective product in exactly the same way. Plastic can be purchased at any office supply store. This collar is enough for several times of use, and even the most dexterous cat will not tear or remove it.
The only downside is that you can’t secure it with tape, so you’ll have to make holes and lacing (see below, in the section with the bottle).
From a bottle - in a hurry
A collar made from a five-liter bottle is used many times and is in no way inferior to a store-bought one. In addition, it is very durable - the cat will not be able to damage it and remove it. It will take 5-10 minutes to make.
What materials will you need:
- five-liter clean and dry bottle;
- marker - such that it does not rub off from the plastic;
- scissors;
- scotch;
- awl;
- ribbon or lace.
The operating procedure is as follows:
Step 1
Cut off the top of the bottle, leaving about 2 cm from the neck.
Step 2
Make a vertical cut. This will make it easier to cut off the bottom of the bottle later.
Step 3
Where the expansion of the bottle ends, cut off the bottom.
Step 4
Cover the inner side (the one that will be in contact with the cat’s neck) with tape so that the sharp edge does not injure him.
Step 5
Also, for safety reasons, round the corners on the outer edge where the cut goes.
Step 6
Make holes for the lace along both edges of the vertical cut. The optimal distance between them is 2-3 cm.
Step 7
Thread the ribbon or string through.
Step 8
Lace everything up well. Then loosen the lacing a little, put the collar on the cat and tighten the tape. Lacing directly on an animal is a disastrous idea.
From fabric
It is made on the basis of a pattern for a plastic cone, but requires fixing the shape. You will need to make a special cardboard frame or plastic insert to give the finished product stability. At the very end, cover the structure with linen or cotton fabric. You can make the protection softer by quilting the collar - using padding polyester or special materials.
This option puts virtually no strain on the neck, so cats quickly get used to it. If you don’t know how to sew, contact a craftsman you know or the nearest studio and ask to make a custom-made accessory.
Conclusion
A cat collar is a reliable means of protection that can be useful in many situations. When purchasing, consider safety and convenience, since aesthetic appearance is not at all important for the animal. But if your soul persistently demands beauty, make sure that the chosen option does not cause negative emotions in your pet, since it will be he who will wear it.
The article is a recommendation!
We add individuality
The harness can be decorated and thereby give it individuality. You can sew beads, beads or rhinestones onto a wide canvas. Models with ready-made stripes, which can be purchased at handicraft stores, look beautiful. You can choose “brutal” appliqués for cats, and cute hearts, bows and lace for your furry pets.
If you like to embroider, you can decorate the fabric of the harness with an interesting ornament, a cute image of a cat or the name of your pet. For ease of design, baste the canvas directly to the harness - its threads can then be carefully pulled out from under the embroidery upon completion of the work.
Ready-made models
Plastic
The bulk of the products are made of transparent and translucent plastic. These are lightweight, comfortable accessories that do not interfere with the cat’s view and are easy to care for.
Popular models:
- Protective collar for cats with collar (TOSHKA and KO);
- Talismed Collar;
- Avita group.
Protective collar with collar (TOSHKA and KO)
The design is made of transparent durable plastic and is secured with Velcro. The comfortable collar makes it easy to put on the collar. Available in different neck diameters, allowing you to choose the size you need. Flexible plastic is fracture resistant. The animal does not lose orientation when moving due to the transparency of the product.
- Plus: the sharp edge of the product is finished with a fabric edging.
- Minus: you need to select the size.
Prices depend on size: from 190 to 995 rubles.
Collar Talismed
The protective cone for cats is made of high-quality plastic and is attached to the collar using three fasteners. A latch-tongue is used for fixation and adjustment. Available in several sizes.
- Pro: Suitable for dogs.
- Cons: sharp edges.
Price: from 101 to 324 rubles.
Avita-group
The convenient plastic design is equipped with soft loops made of non-woven material for attaching to a cat's collar. It has several diameters, which allows you to choose the size you need. Fixed with Velcro. The transparent plastic of the collar does not interfere with good visibility.
- Plus: no sharp edges.
- Cons: Requires sizing.
Price: from 95 to 150 rubles.
Soft
Unlike hard plastic structures, soft models are made of opaque fabric and non-woven materials. Collars are produced in the shape of a truncated cone, equipped with Velcro fasteners and attachments to the collar. It is more comfortable to sleep in soft models, but in them animals are less oriented in space.
Popular models:
- Freddy's Friends Brand Pillow Collar;
- Medical collar OSSO;
- Kruuse Buster Soft Collar;
- Disposable post-operative collar Kruuse Buster.
Freddy's Friends Brand Pillow Collar
A very comfortable and soft alternative to plastic structures. The product is made in the form of a round pillow made of durable water-repellent Oxford fabric. Additional softness is provided by synthetic padding. Fixed around the neck with a cord with a clip.
- Plus: good review.
- Cons: high price.
Price: from 850 to 1150 rubles.
Medical collar OSSO
The model is made of durable Oxford fabric - a cat will not be able to tear it. To secure it on the animal's neck, the collar is equipped with a Velcro collar. The cat experiences less discomfort when wearing it, thanks to the small dimensions of the product and its flexibility.
- Plus: does not affect the animal’s thermoregulation.
- Cons: bad review.
Price: from 190 to 455 rubles.
Kruuse Buster Soft Collar
This simple fabric model is made in the shape of a four-section cone. The fabric is water-repellent. The edges of the product are finished with piping. Fixation is carried out using lace and loops.
- Plus: has good flexibility.
- Cons: bad review.
Price: from 120 to 200 rubles.
Disposable post-operative collar Kruuse Buster
The collar is intended for one-time use after surgery. Made from non-woven waterproof material. The non-rigid design makes it easier for the pet to see and does not interfere with daily functions. Fixed around the neck with a drawstring.
- Plus: it doesn't rub your neck.
- Cons: disposable.
Price: from 150 to 170 rubles.
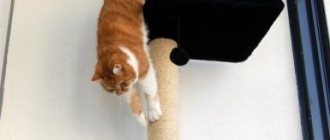
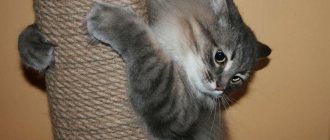
How long will a scratching post last?
Any, even the most expensive branded scratching post, wears out over time and loses its original appearance. The frequency of replacement of the scratching post depends primarily on:
- Product quality.
- Conditions of its operation.
- Caring for her.
So which one should you choose? Advice from cat owners will come to the rescue. The rating is based on customer reviews:
- Sisal scratching post. Can last up to 3 years. This is a conditional figure. The thicker the sisal rope, the longer it will last.
- Jute model - up to 2 years. Also depends on the thickness of the rope.
- Carpet - about 1.5 years.
- Faux fur, which can often be found in cat complexes - up to a year. And this is subject to regular cleaning.
- There are two types of cardboard. Whole cellulose, higher quality, lasts up to six months, double-sided cellulose - up to 12 months. Waste cardboard, the cheapest, is thrown away 2 months after purchase.
The sisal scratching post lasts the longest!
Sew a collar for a cat
This process is very exciting. It will take a small amount of time, so the question of how to make a collar for a cat will become a very favorite one for you.
- Take the thickest piece of fabric in any color you like.
- Prepare a fastener or hook that is easy to use, as well as the necessary tools to sew it on.
You will also need a couple of beautiful stones or any other decorations of your choice, preferably similar in size, which can be tastefully sewn onto the collar.
- Using a centimeter, measure the volume of your cat's neck, and cut out a thin strip from thick material.
- Glue or sew stones at equal distances from each other or other decorations onto the strip and attach a clasp or a simple button using a needle and thread.
You can watch one example of how to quickly and easily make a collar for a cat in the video right now.
Your collar is ready. Don't forget that this is just a basic template for making a collar at home. You can show your imagination by attaching beads and beads in addition to stones, and also sewing a beautiful ribbon or bow in the middle of the collar.
A distinctive feature of the collar will be its originality and individuality in manufacturing, which is valued very highly in the modern world.
Before deciding how to sew a collar for a cat with your own hands, you need to decide on the size
It is important that the collar fits tightly to the cat's neck, but does not choke it! A loose collar is also not suitable, as the animal can easily get rid of it or lose it.
So, take a soft meter (the kind your grandmother or mother probably used) and grab the cat's neck without squeezing it. We will sew the accessory using these dimensions.
Next, having decided on the type of fastener, we make a pattern. It will be in the shape of a rectangle of the width you need. Also remember to leave 15cm free end and seam allowance. Here it is necessary to take into account that the coarser the material for the collar, the more allowances will have to be left.
It should be noted that when choosing a material, you need to take into account its lack of odor. A strong and unpleasant smell can scare away a cat.
Then we stitch the entire collar around the perimeter on one side and turn it inside out to the other side. Next, we sew on the fastener and, if necessary, process the holes so that they do not fray. Now all that remains is to present your creation to your ward.
Base options
Item needed:
- strong enough to support the weight of the animal;
- lightweight so that bulky structures are not required for mounting to the wall;
- Receptive to glue well, good for processing with tools.
Cheapness is an important parameter, but not as much as for coating. The base is expected to last a long time. Is this always necessary? Assess the complexity and wear time of the craft. It may turn out that it is more rational to replace it completely than to remove the glue.
For the base take:
Note!
- How to make wooden shelves with your own hands - original design options
- Kinusaiga technique for beginners: what is it, a description of creating paintings from threads
How to weave a figurine from rubber bands: how to learn to weave animals, toys and what you can make from rubber bands on a slingshot
- plastic water and sewer pipes - they are easily sawed across and lengthwise, it is easy to make a frame of any shape from them with reliable fastenings from standard adapters;
- pieces of plywood of various thicknesses;
- sections of tree branches after sanitary pruning at the dacha (necessarily healthy fragments, so as not to bring pests into the house).
The branches can also be used for decoration: a cat lying on them, attached to the ceiling, will decorate any apartment.
Making an Elizabethan collar for cats with your own hands
If you don’t have the opportunity to visit a pet store, and you need a protective cone yesterday, make it yourself. This does not require special talent, so anyone can cope with the task. You just need to follow the instructions, which explain in detail how to make a collar for cats with your own hands from cardboard, a plastic bottle and other materials that are at hand.
Made from cardboard - disposable
A disposable collar is suitable for the anti-flea procedure - to prevent the cat from scratching or licking the product. It is also useful for one-time manipulations. The maximum period for wearing a cardboard accessory is 3 days.
What you will need for production:
- 2 sheets of A4 cardboard;
- ruler;
- a compass or round object - for example, a jar lid;
- marker, pencil or pen;
- scotch;
- scissors.
The whole job will take no more than 5 minutes.
Step 1.
Prepare all the tools. Find the middle on the long side of the cardboard sheet.
Step 2.
Starting from the found middle, draw a semicircle using a lid or compass. The radius for a medium-sized cat will be 6 cm, but after trying on everything will be adjusted.
Step back about 10 cm from the inner semicircle and draw an outer semicircle.
Step 3.
Cut out the workpiece - it turns out to be ½ circle. Now, placing it on the second sheet of cardboard, outline and cut out ¼ of a circle.
Step 4.
Connect the cut with tape. You should have ¾ of a circle - that is, a full collar.
Step 5.
Try the collar on the animal. If it’s too tight, move it a little away from the inner radius. Do not start with large numbers - often it is enough to step back from the edge by 0.5 cm.
Step 6.
Place the accessory on the animal and secure with tape.
Made from plastic - reusable
You can make a plastic protective product in exactly the same way. Plastic can be purchased at any office supply store. This collar is enough for several times of use, and even the most dexterous cat will not tear or remove it.
The only downside is that you can’t secure it with tape, so you’ll have to make holes and lacing (see below, in the section with the bottle).
From a bottle - in a hurry
A collar made from a five-liter bottle is used many times and is in no way inferior to a store-bought one. In addition, it is very durable - the cat will not be able to damage it and remove it. It will take 5-10 minutes to make.
What materials will you need:
- five-liter clean and dry bottle;
- marker - such that it does not rub off from the plastic;
- scissors;
- scotch;
- awl;
- ribbon or lace.
The operating procedure is as follows:
Step 1
Cut off the top of the bottle, leaving about 2 cm from the neck.
Step 2
Make a vertical cut.
This will make it easier to cut off the bottom of the bottle later. Step 3
Where the expansion of the bottle ends, cut off the bottom.
Step 4
Cover the inner side (the one that will be in contact with the cat’s neck) with tape so that the sharp edge does not injure him.
Step 5
Also, for safety reasons, round the corners on the outer edge where the cut goes.
Step 6
Make holes for the lace along both edges of the vertical cut. The optimal distance between them is 2-3 cm.
Step 7
Thread the ribbon or string through.
Step 8
Lace everything up well. Then loosen the lacing a little, put the collar on the cat and tighten the tape. Lacing directly on an animal is a disastrous idea.
From fabric
It is made on the basis of a pattern for a plastic cone, but requires fixing the shape. You will need to make a special cardboard frame or plastic insert to give the finished product stability. At the very end, cover the structure with linen or cotton fabric. You can make the protection softer by quilting the collar - using padding polyester or special materials.
This option puts virtually no strain on the neck, so cats quickly get used to it. If you don’t know how to sew, contact a craftsman you know or the nearest studio and ask to make a custom-made accessory.
Conclusion
A cat collar is a reliable means of protection that can be useful in many situations. When purchasing, consider safety and convenience, since aesthetic appearance is not at all important for the animal. But if your soul persistently demands beauty, make sure that the chosen option does not cause negative emotions in your pet, since it will be he who will wear it.
The article is a recommendation!
How to use a cat collar and what problems you may encounter
Using the collar is very simple: you need to put the device on the animal’s neck and mechanically fix it with the means available for this. Ideally, the cat should not be able to remove the cone from itself, nor should it be able to reach an area of the body that should remain untouched. But in some cases this may be difficult.
The author of these lines lives with a wonderful red cat of the European common breed. She is very small: weighs 3.5 kg at 5 years old with excellent nutrition and the absence of any parasites. I adopted her as a kitten in very poor condition and treated her for a long time: first for her ears, and then for allergic dermatitis. I had to buy a cone at the stage of treating the ears so that the animal would not scratch them. I bought the cheapest cone, plastic, “transparent”. There was no way for the cat to scratch its ears. The same cone helped after sterilization. But later, dermatitis appeared on the animal’s back and tummy, which my pet regularly bit and licked, leaving open wounds on itself. And the cone did not help, because, stretching out, she easily reached the lower abdomen, individual areas closer to the tailbone and the outer side of the thigh. In this case, the cat simply removed the larger diameter cone, being very miniature. Fabric cones with Velcro did not help either: with them it turned out exactly the same.
I had to sew her homemade clothes from the trouser legs of old long johns, which simply covered all the affected areas. The cat licked and scratched the clothes, but did not touch the wounds themselves. As a result, with good nutrition, within two months all the wounds healed and began to grow over with hair. As it turned out later, there is a separate category of products - postoperative fabric blankets, which are created just for such cases.
Postoperative fabric blankets - a possible alternative to a veterinary collar
A collar chosen to fit will not interfere with the animal's drinking and eating. At the same time, certain inconveniences during movement cannot be ruled out: some animals quickly adapt to the collar, while others are disturbed by it, but these are temporary difficulties and they are not critical. As a last resort, you can use a blanket or a homemade collar.
Detailed instructions for making a collar
Of course, most people in the world fall into the category of consumers, and in the case of cat collars, many prefer to just go out and buy one. But at the same time, there are also people who want to create something and bring their originality and zest, so to speak. And such people often wonder: how to make a collar for a cat with your own hands?
This step-by-step instruction is dedicated to such people. After choosing the fabric from which the collar will be made, you need to arm yourself with certain tools:
- scissors;
- needle and thread;
- bijouterie;
Next you can start cutting out the collar. If the choice fell on fabric, you need to take a small rectangular piece of leather and process all the edges; you can bend them so that they do not interfere with sewing. It is necessary to fold it and make sure that the folded edges do not open up, and make a machine stitch, this will be more reliable, but you can also sew it by hand with an overcast stitch, this will also be reliable. Next you need to start decorating the collar. Since the collar is leather, you can glue metal spikes to it or make embroidery, for example, embroider the name of a pet. Then you need to choose a reliable clasp.
You can make a collar from rubber bands; to do this, take a rubber thread, thread beads or seed beads into it and secure it carefully and firmly. This collar is very easy to take off and put on without torturing your cat. The principle of operation is the same as for weaving with beads. You need to take an elastic band half a meter long and thread three beads or beads into one end, and one into the other; the second end of the elastic should be passed through three threaded beads and tightened. And thus continue, combining the colors of the beads and gradually increasing their number.
A cat collar can be made from either fabric or thick paper. To do this, you need to take two measurements: neck circumference and length. The collar should be shaped like a cone; the edge can be decorated with ribbons or piping.
What is a scratching post for?
The simplest reason is that pets have long had to get their own food.
No less interesting is the hypothesis about the relationship between cat health and the claw scratching procedure. There is an opinion that here we are talking about a kind of exercise for the whole body. The surface on which the cat rests acts as a training device. All muscles and bones of the skeleton take part in the process.
The next reason also concerns health. Towards the end of the paws, pads and claws there are many nerve endings and blood vessels.
By scratching, the cat massages sensitive areas, improves its tone and even gets nased. Often, a cat, stretching on a scratching post, purrs contentedly, how such training delivers.
It is believed that with the help of a nail polisher, animals renew their claws and thus prevent the possible development of inflammatory processes in the paw pads.
With your own hands
It is not always possible to quickly select a ready-made medical collar of the required size and dimensions. In addition, it is possible that a protective accessory is needed urgently, but there is no time to search and purchase. There is only one way out - to make an E-collar with your own hands.
We will look at the most popular models of homemade collars and tell you how to make them at home.
The most popular materials for this barrier protection product are:
- cardboard;
- lightweight plastic;
- plastic bottle;
- textile.
Cardboard
The simplest and easiest way to make a collar for a cat.
A cardboard structure can be built in a hurry when an animal urgently needs protective equipment. The model is not suitable for long-term use, but it can cope with its task within a few hours. In the future, industrial designs or collars made of other materials should be used: plastic, soft fabric.
To make your own cardboard collar you will need: cardboard, tape and lace.
How to make a cardboard collar:
- Take thick cardboard. Boxes from household appliances or shoes will do.
- Take measurements from the cat - neck circumference (measurement No. 1) and neck length from the collar to the tip of the nose (measurement No. 2).
- Draw a cone on the cardboard with the length of the inner circle equal to the circumference of the neck (+2.5 cm). The width of the product will be equal to the second measurement (+2.5 cm).
- Cut out the collar according to the drawn pattern.
- The edges of the cone must be treated with tape.
- Using a lace, fasten the parts of the cone.
- For ease of wearing, make loops for the collar.
You can use a stapler, sticky tape or tape to secure the edges of the cone.
Video
Made from lightweight plastic
A more solid and reliable design is made from lightweight plastic. Such a collar is not inferior in its characteristics to finished plastic products.
To make a plastic collar you will need: a stationery folder or a flexible cutting board, tape or wide adhesive tape, a stapler and a textile fastener (Velcro).
How to make a collar from lightweight plastic:
- The pattern for the product is made in the same way as for a cardboard model.
- A cone is cut out from a stationery folder or cutting board according to the pattern, adding 2-3 cm along the edges to adjust the size.
- Sharp edges are treated with adhesive tape or tape.
- The textile fastener is attached to the plastic edges of the cone using a stapler.
To make it easier to fix the product on your cat, you can improve the design by cutting or constructing loops for the collar.
Video
From a plastic bottle
Models of Elizabethan bottle collars are popular among cat owners - this material is found in every home. Bottle plastic is transparent, flexible and durable - collars made from them will last a long time.
For a plastic bottle collar you will need: a water bottle, tape, adhesive tape or string.
How to make a collar from a plastic bottle:
- Choose a transparent bottle of the appropriate size.
- On the side of the neck, a marker marks a diameter equal to the circumference of the pet’s neck.
- The neck is cut off and the length of the cat’s head is measured (measurement No. 2).
- The rest of the bottle is cut along the marked line.
- So that the product can be put on a cat, the cone is cut lengthwise.
- The lacing is threaded along the cutting line into pre-made holes or a Velcro fastener is attached using a stapler.
To prevent the animal from injuring itself, all sharp cuts are sealed with adhesive tape or tape.
Soft fabric collar
Not all cats will like hard plastic and cardboard structures. Capricious pets will like soft fabric products more. The collar is sewn from cotton fabric to minimize possible allergic reactions. Linen or cotton is best suited for this purpose.
To create a more dense structure, a cardboard or plastic base is placed between strips of fabric, and the collar is stuffed with padding polyester or cotton wool.
The simplest collar can be sewn using the pattern that was used for the cardboard and plastic versions. Don't forget to add 1.5 cm at the seams. Along the cut line, the edges of the collar are secured with adhesive tape.
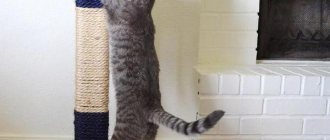
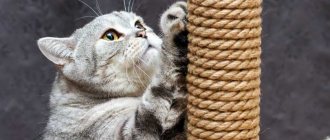
What should a scratching post be like?
The main requirement for a place to sharpen cat claws is strength. — The surface of the claw blade should be fibrous and rough. The fibers must break, otherwise the pet will hang on the sharpener, becoming entangled in it.
And lastly, the material must remove static electricity: furry pets with their furstekikikikikikik
If you combine all these requirements, you will understand that they are fully met by natural materials: wood, hemp, burlap, coarse woolen fabric, thick cardboard.
Important! Devices for sharpening claws should not contain metal nails, screws or claws omnepemmetemob, inmateb
You can get by with a simple board, but if you really care about your cat, it is better to equip the structure with a bed on a hill.
The furry owner will be able to survey her possessions, the highest support as razodimtikamotikamotikamotikamotikam
Important. Cats never leave marks where their den is, this is an instinct of self-preservation.
If your pet is large enough, then the sharpener should match its size. When creating a product, you first need to focus on the dimensions of the cat. Especially when you are making a wall model, otherwise the animal may scratch the wall.
The length of the scratching post should be 5-10 centimeters of the length of the animal itself (the tail, in this case, is very long). The width of the product is oriented towards the width of the outstretched paws.