Sharp cat claws often cause problems for the owner if his pet does not leave the apartment. Not everyone knows how to trim their claws on their own, especially since during this procedure the animal can be seriously injured. Therefore, the best way out of the situation is to purchase or make a scratching post for your cat with your own hands. Let's find out how to properly organize this process at home.
Selecting size and shape
Regarding the size of the scratching post, there are certain standards in this regard: the larger the pet, the larger the scraper should be. The parameters of the product directly depend on the size of the cat. This is especially important for wall models, so that the cat does not scratch the wallpaper while sharpening its claws.
The width of the claw blade in this case should be equal to the width of the animal’s outstretched paws. You can calculate the length of the scratching post by adding 5-10 cm to the length of the cat itself (excluding the tail).
For Maine Coons, the height of the vertical nail bed should not exceed 100 cm, especially if there is a bed on top. This is necessary in order to remove excess load from the front paws when jumping. For a kitten, make a scratching post “for growth”, focusing on its approximate future size as an adult.
If the living space allows, then it is better to supplement the nail sharpener with a bed and a house, one or more.
The variety of scratching post models is simply amazing. There are 2 main types of scratchers: floor and wall (or hanging). There are many variations within each type. Thus, floor scratching posts can be flat (located horizontally or at an angle), in the shape of a column, equipped with additional beds, stairs, bridges and houses.
The more cats there are in the house, the more elements the scratcher should consist of.
And almost all designs can be made with your own hands from available materials. The main thing is your desire and willingness to spend a certain amount of time on your pet.
Why do you need a cat scratcher?
A cat's claws grow throughout their cat's life, and to prevent their size from exceeding a comfortable norm, animals file them down by scratching something hard.
“Master, do you have a scratching post? That means you have extra furniture!”
Yes, cats will tear at something with their claws in any case, and it would be cruel to deprive them of this opportunity. If the claws are not kept in order, cracks and chips will not occur, and it will be easy to climb trees.
Long claws hinder the animal to the point of pain while walking, there is a real chance of getting a twisted claw and sprained ligaments!
If a pussy visits the street, then it needs protection, and without a manicure, going outside can lead to problems.
Nature has provided for the growth of claws and their grinding. So, we create suitable conditions for the cat!
Advice! Pay attention to which piece of furniture the cat is tearing up with particular zeal. A scratching post covered with the same material will distract your pet from dirty activities with an object not intended for damage.
Required materials and tools
A cat's sense of smell is much more subtle and sensitive than a human's. Therefore, when making such an important and necessary attribute of a cat’s life as a scratching post, you need to use only natural materials that do not have a pronounced odor. Yes, this would be perfect:
- tree;
- jute, linen or sisal ropes;
- leg-split;
- sackcloth;
- hemp;
- pressed or corrugated cardboard;
- carpet
But artificial materials can cause allergies and cause serious harm to the cat’s health. For example, you should not make a scratching post from a plastic pipe - plastic has an unpleasant odor and is allergenic.
Another important advantage of products made from natural fibers is that they remove static electricity well.
The surface of the scratching post should be made rough and durable, but not too hard. The process of scratching should give the cat pleasure and relax it, and not bring unpleasant, and even more so, painful sensations to the animal, and cause broken claws.
The cat's claws should penetrate several millimeters deep into the fabric, tearing the fibers of which it is composed, but without clinging to them. From this point of view, the best solution is sisal rope.
- Try not to use nails and metal staples to connect the parts of the nail clipper, or fix them tightly and thoroughly so that your pet does not get hurt when cleaning its claws. It is advisable to place the fastening parts on the reverse side of the product.
- The material for the scratching post also depends on the size of the animal. If the cat is small, then it is better to give preference to models made of cardboard or corrugated cardboard - if the coating is too hard, the baby can damage its claws.
- However, large representatives of the cat family have stronger and harder claws, so it is worth making cloth for them from stronger and more durable materials. For a large cat, natural wood is suitable.
Only it is better to choose a tree that does not smell strongly and without knots, having first cleared it of bark.
And, of course, be guided by the tastes of your cat. Look at what your pet is sharpening its claws on now. Try to use the same or similar material when making homemade scratches. If he prefers doors, then a piece of wood will do.
If he “does a manicure” on rugs, then carpet will be the best choice; scratches the furniture upholstery - choose jute or sisal rope for covering (the latter is the most reliable and durable material, although the most expensive).
To create a scratching post you may need the following tools:
- threads;
- glue;
- scotch;
- compass;
- screws;
- stapler;
- stationery knife;
- drill;
- hammer and others.
Each model will have its own set of tools.
Cardboard rectangular scratching post
With a rectangular or square option, the operating principle is the same:
- Cut cardboard strips of the same width and length depending on the desired size of the future scratching post.
- Make the base also from cardboard or use a ready-made box, then adjust the strips to its size.
- Glue each strip using a heat gun or other reliable glue, then lay tightly in a row next to the other until the box is completely filled.
- This design can be placed on the floor or fixed to the wall using double-sided tape. To do this, wide strips of tape are glued to the bottom of the box at the top and bottom, then the structure is attached to the desired location.
You can sprinkle catnip on the bottom (under the cardboard strips) or put a piece of fabric soaked in it.
We make a scratching post out of cardboard with our own hands
To make the most budget-friendly and simple scratching post pillow, you will need the following materials and tools:
- cardboard or corrugated cardboard;
- stationery knife;
- piece of fabric;
- thick paper;
- PVA;
- adhesive tape.
Then do the following:
- Disassemble the boxes and draw stripes more than 10 centimeters wide on the surface.
- Cut strips.
- Then you need to twist one strip and glue it. This will be the middle or core of the scratching post.
- Then wind all the other strips in the same way around the core, periodically securing the layers with glue or adhesive tape. Particular attention should be paid to the last layer.
- Wrap the pillow in fabric and secure it.
- Place the structure on thick paper, trace the perimeter, cut it out and secure the base to a scratching post.
Note to the home handyman
There are many materials on sale that are suitable for making such products. The costs will be minimal:
- Cardboard cylinders left over from selling linoleum are great for making posts and columns.
- And to make a cat house, it is advisable to have a sheet of plywood or chipboard.
- To make it comfortable for the animal to climb, it is advisable to cover the products with carpet or thick fabric. In addition, they look much more fun and elegant. You can combine a scratching post and a cat house in a single complex.
Important! For a small apartment with very little space, a good solution would be to combine an ordinary bookshelf and a cat bed. In this case, the shelves need to be placed in the form of a “ladder” so that the domestic animal can move freely.
Scratching post on the rug
The scratching post bed for cats is very convenient. It will be easier for the animal to get used to it, because it will be possible to rest on such a rug in the absence of its owners.
By the way, you can choose a material that will make the scratching post fit perfectly into the interior.
- To work you will need colored rope, any rug, a knife, a stapler and sisal rope. We determine the center on the rug - this is the place where the scratching post will be located.
- Using glue, attach the sisal rope to the rug. It is better to also treat its edges with glue so that the cat does not pull the threads out of it.
- You can leave the mat as is, or stretch it over a wooden stand, using a stapler to secure the edges. Then the scratching post can be attached to the wall.
Why do you need a scratching post for a cat and why do animals damage surfaces?
No matter how cute a domestic cat may seem, the animal was still initially classified as wild, so many instincts are preserved in domestic animals. Even cats that permanently live in an apartment, but for some reason find themselves outside, when in danger, try to climb a tree or any other high surface. Outdoor cats use their claws not only for climbing, but also for hunting prey. It is the sharp claws that allow the animal to grab onto another animal with a death grip.
If there is no scratching post, the animal will grind its nails down on furniture, wallpaper and other surfaces.
This is interesting! Recently, the “soft paws” operation, which involves the complete removal of the nail phalanx, has become popular among cat owners. However, most veterinarians are categorically against such manipulations, because after it the animal essentially becomes disabled. Complete declawing can be compared to amputating a person's fingers.
The claw itself is considered a sensitive element, the surface of which is constantly renewed. A person has the opportunity to cut his nails as they grow, and the animal removes the stratum corneum using any suitable surface, be it the trunk or roots of a tree. As for wildlife, when sharpening their claws, felines release special substances that leave an odor on the surface. This method is considered one of the options that allows the animal to mark its territory.
A cat that lives permanently at home does not have the ability to grind its claws on the hard surface of asphalt or wood, so if there is no scratch for the cat, the animal will use any surface it likes for this purpose. If the cat is not offered an alternative option, it may well come to the point that you will have to change the upholstery of the furniture or re-glue the wallpaper.
Animals use a scratching post to remove the stratum corneum from their claws.
Wall-mounted plywood scratching post
Looking at photos of hand-made scratching posts, we can see this option. This design is very easy to make.
It is only important to calculate the dimensions correctly. It is better if the scratching post is 10-15 centimeters larger than the cat’s height. This will protect the walls from scratches. In terms of width, it is better that the surface is at least 40 centimeters.
- You will need to prepare two plywood sheets with a width of 25 centimeters (for large cats, these parameters naturally increase). For a soft layer, a piece of old carpet will do - you will need to secure it to the plywood with the wrong side up. The piece is fixed using a stapler.
You can also wrap the sheet with a rope and secure it with slats along the edges. Next, the structure is nailed to the wall. All that remains is to train the cat to use the device.
Types of complexes
The complexes are the most expensive and at the same time expedient purchase for your graceful, handsome man. Such adaptations are always made taking into account three characteristics of cats - the instinct of a hunter, the love of climbing in high places and the absence of boredom. There are the most original and unexpected combinations of complexes. They can consist of beds, scratching posts, platforms and shelves, steep stairs, and there must be a house in it. All this makes up a complete complex for entertaining cats.
The more complex and higher the device itself, and the greater the number of options for placing parts, the longer the interest in the complex of your home hunter will be. For example, Pet Salon, Trixie and others, it would seem, take the very essence of the cat as the basis for various complexes. The Catrix product is a product of the global market, boasting unique complexes in terms of convenience and functionality. Of course, the manufacturers themselves position it as a scratching post; in fact, it is quite possible to classify it as one of the most impressive and versatile gaming systems.
For the owners, such a complex may be reminiscent of a Lego set, since it is assembled using carefully thought-out parts.
Quick option
It happens that a cat appears in the house unexpectedly, or you are given an animal for a while (for example, the owners go on vacation).
In this situation, a DIY scratching post house is an additional waste of time. You can make the construction faster:
- A softwood log is an excellent alternative to the store-bought version. Its length can be about 70-100 meters. We chop the log lengthwise and attach a piece to the wall.
- You can take packaging cardboard and roll it up. We secure it with rope in several places and attach it to one of the walls.
- An old carpet or bedding can be rolled up with the inside out - it will be convenient for your cat to sharpen its claws on this surface.
Photo gallery: cats play with homemade toys
Little kittens need toys to hunt
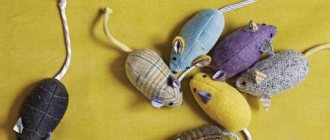
A ball of thread is one of the simplest toy options Boxes and bags are some of the most favorite entertainment for cats Cats love soft knitted toys Cats love to hunt for fishing rods with a variety of attachments You can even keep a kitten occupied with a roll of toilet paper An interactive toy can be made from a cardboard box
Design of a sharpener for cats
Before starting work, you should familiarize yourself with important tips and recommendations:
- The height of the working column for sharpening claws should not be less than 100 mm;
- Beds and other accessories are located above the column;
- The diameter of the pillar is at least 100 mm;
- The house is installed on top of the entire structure;
- If there is more than one cat in the family, then the beds are installed on the same level;
- The base of the device must be strong, heavier than the weight of the pet, and its dimensions are quite large.
- If the object is created from a pipe, then its height should be twice the length of the cat.
- The cardboard sharpener is only suitable for kittens and small breeds.
- It is not necessary to hang toys on ropes in this structure.
In order for your pet to fall in love with this device, you need to follow some useful tips. You need to study the habits of your pet, and notice what he has chosen to realize his instinct.
For this reason, you can choose the type of structure and determine the location for it. The cat must be directed to the right place by taking its paws in your hands and running them along the rough surface of the sharpener. Pet the cat and treat her to something tasty.
Observing the movement of the animal to its favorite place, pick it up and take it to the scratching post. On furniture that is at risk from sharp claws, you can spray a few drops of citrus freshener. Cats do not like this scent, and it will repel the “attempt”. You need to be patient with getting your cat accustomed to the sharpener; this process is not quick.
The animal needs to be praised and treated, so the cat will quickly understand that sharpening its claws on a special device will only be praised.
How to choose a toy for a cat
In order for the toy to truly interest your pet, you should pay attention to important points:
- the material from which the toy is made must be ergonomic and not have a strong odor;
- You should not use a toy of poisonous colors, as this may scare away the animal;
- there is no need to purchase toys that are too small, as your pet may swallow or choke on a small object;
- You should not give your cat a heavy toy, otherwise it will be difficult for the pet to move it;
- It is not recommended to give your pet an overly hard toy, so that he does not hit the sharp corners of the product or break his teeth on a hard surface;
- The toy can be easily washed.
Cats perceive most colors in dull colors. But, there are various shades of gray. For a better visual perception of an object, it is better for a cat to purchase toys in a contrasting or gray color.
When choosing a toy, you should pay attention to the pet’s individual character traits, health status and age restrictions. For example, if a cat gains a lot of weight after sterilization, give preference to those toys that stimulate the animal to move. For a cat with poor eyesight, toys with sound accompaniment are suitable. The best option is to offer your pet several toys and from this draw a conclusion about the preferences of your furry friend.
What sense organs should toys act on in order to attract the animal’s attention:
- vision - glowing, moving, shaking toys (balls, laser pointer, sunbeams, running mice and various interactive structures);
- hearing - bells, imitation of bird voices, rustling, ringing, grinding;
- touch - fur or lint, similar to the skin of an animal;
- taste and smell - specifically smelling material, adding favorite aromas to the toy (fish, poultry, meat, catnip, honeysuckle, etc.).
How to make a hanging model?
Wall-mounted (or hanging) scratching posts have many advantages over floor-mounted ones.
- They are stable, there is no risk that a playful cat will be able to turn over such a sharpener, since it is tightly secured in a certain place in the house. The wall-mounted scratcher is perfect for active, playful and large pets.
- It does not take up much space, so this type is the best solution for small apartments.
- Thanks to the vertical position of the hanging scratching posts, wool will not collect on them.
- They can be used to cover wallpaper on the wall that has already been scratched by your pet - this is another important advantage of wall models.
- And finally, such a scratching post is easiest to make at home.
We will tell you a detailed algorithm for its production.
- We will need a rectangular piece of plywood or wood panel as the base of the scratching post. The optimal width is 40-45 cm, so that the cat does not touch the wallpaper, stretching its paws to the sides. The length of the scratching post should be slightly greater than the size of the cat itself in the position of its paws extended upward.
- The prepared wooden base must be covered with material on which the cat will sharpen its claws. Carpet with the wrong side facing out is suitable for this purpose (it is better to make it two-layer for maximum strength and durability).
- You can also use a cotton blanket folded in several layers, or even thick corduroy.
- The size of the fabric sheet should be slightly larger than the parameters of the wooden rectangle, so that the edges of the material are wrapped on the wrong side and fixed with glue or using a stapler.
- Another covering option is to wrap a piece of plywood with jute rope or twine.
- We drill several holes on the wall with a drill and attach the scratching post using 4 slats and 6 long screws.
You can also make a corner scratching post, which cats love very much. To do this, you need to take not one, but two pieces of plywood, the width of each of which should be at least 25 cm. We glue a fabric layer onto both wooden sheets and fix the structure with screws on one of the protruding corners of the room or on the vertical plane of the doorway.
However, if you don’t want to spend a lot of time making a full-fledged hanging nail clipper, then you can simply cover the walls to any height with carpet.
How much can you buy a scratching post for cats - price review
If you suddenly want to buy a nail clipper for your pet, but are not inspired to do manual labor, then you can buy any product. Models with one tier and a sun lounger on top cost from 700 to 3,000 rubles. A cat house with a scratching post can be purchased at a price of 4,000 rubles. A gaming complex with several floors will cost the owner at least 6,500 rubles. A simple flat design in the form of a couch or rug costs about 350 rubles. Build or buy a cat extravaganza, let your pet be happy in your home!
Save time: selected articles delivered to your inbox every week
Step-by-step instructions for making a floor-standing scratching post
- The main advantage of a floor-mounted scratching post is its mobility - the ability to quickly change the location of this cat attribute in the apartment at your discretion.
- There are a huge number of models of floor-standing scratching posts, including those that you can make yourself. Let's talk about the main options that are easiest to make with your own hands.
- The simplest and fastest model to make is a regular horizontal scratching post, which can also serve as a cat bed.
- Take a sheet of plywood or a regular board. We cover it with carpet on both sides with the wrong side facing out, and the edges of the material can also be sewn with thick threads or secured with a stapler. That's it, our scratching post, also known as a bed, is ready.
But here is a slightly more complex version of the horizontal rag.
- To a wooden rectangular board measuring 30*60, we nail a block of the same size on both edges (you can screw them with screws using a drill). They just need to be securely fixed so that the cat does not get injured on the iron parts.
- Next, we wrap the wooden board with a rope (jute, sisal or twine), after having greased it with glue.
- Additionally, you can secure the coating by drilling two holes in the board next to the bars and threading ropes through them, making knots at the ends.
You can make a scratching post not horizontal, but at an angle (in the shape of a slide).
- To do this, we will need another wooden plank, the same or slightly shorter length than the main one (the angle of inclination of the future product depends on this).
- We cover both planks with carpet or other hard, dense fabric. We fix the fabric with glue, you can also sew the edges of the fabric from the inside.
- We connect the two parts of the scratching post to each other with furniture corners or tightly driven nails.
- For greater stability, it is better to place such a scratching post next to the wall.
Another fairly easy-to-make (though short-lived) type of floor scratching post is made from cardboard. It will require the following equipment:
- pressed cardboard;
- stationery knife;
- glue;
- scotch.
The procedure is as follows:
- cut a sheet of pressed cardboard with a stationery knife into equal strips approximately 1 cm wide;
- glue them to each other with the smooth side so that the ribbed wavy edges of each strip are on top and bottom;
- wait for the glue to dry;
- and the final touch - we tape the resulting scratching post around the entire perimeter to make the structure more durable.
The most popular type of cat scratcher is the post scratching post.
- To make it, you will need 1 sheet of chipboard, from which we will make a stand for the nail clipper. For this purpose, you can use a former countertop, parts of an old cabinet or other furniture. The base should be wide and stable enough so that the cat does not overturn the entire structure during play.
- The shape of the stand can be round, square or rectangular, at your discretion. If you choose the first option, then you will have to use a compass to first draw an even circle, and then cut it out exactly along the circumference with a jigsaw.
- You can leave the wooden base as is, but it is best to make some kind of covering so that the cats can also use it as a bed. You can cover it with carpet or glue it with jute rope, moving from the edges to the middle.
- If you want to make an additional bed for your pet at the top of the scratching post, you will need another sheet of chipboard or plywood, equal in size to the bottom one.
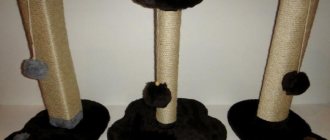
- The column itself can be made from a metal pipe or several tin cans placed one on top of the other. We connect them to each other using glue, after placing some heavy object in the bottom one for stability of the structure. Then we cover it first with carpet, and then with rope. We connect the column to the base using furniture corners.
- If you make a post from wood, it can be either round or rectangular. The average height is 60-80 cm. It can be covered with nothing or wrapped with sisal or jute cord, pre-lubricated with glue. It is attached to the base with nails or screws.
We will hang the toy on the top of the scratching post, securing it to the end of the rope.
Almost everyone can make the above options for claws.
But to make a scratching post with a bed and a house , you will need at least minimal carpentry skills and preferably a partner.
- You will need 2 sheets of plywood: one larger (for the base), the second smaller (it will serve as a lounger and should be equal to the size of the cat when extended, both in length and width).
- We take two wooden posts of the same diameter. One of them will be a stand for the house, the second will act as a scratching post, and there will also be a bed on it. The first should be significantly smaller in height than the second - about 30 centimeters.
- We screw both posts to the base with self-tapping screws.
- We coat a large post with glue and wrap a rope made of jute or sisal around it.
- After the glue has dried, we place a smaller sheet of plywood on top of the structure, covered with carpet or furniture fabric. The bed is ready.
- Having made the markings, we cut out the walls, ceiling and bottom of the future house from wood or plywood. They should be the same size, approximately 35*35 cm. We cut a round inlet hole, which we first draw with a compass. We nail all parts of the house to each other. They can also be pre-covered with fabric.
- In the center of the bottom of the house we mark the attachment points to the base post. For greater stability, you can attach it to the scratching post itself, first making markings on the wall. We fasten the house with self-tapping screws.
If you have more than one cat, and you want to make a scratching post part of a play complex with several beds and houses, then you will need a preliminary drawing of the structure (for wooden and metal elements), as well as cutting (for fabric upholstery).
Schemes of various models can be found on the Internet or created yourself.
Scratching post-post. We do it ourselves - the cat rejoices
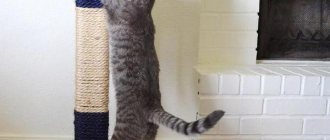
This cat simulator is especially loved by our pets. The average height of such a claw sharpener is approximately 1 meter. And the main difficulty in making a column is to find the column itself!
So, your cat is lucky and the appropriate size pipe is already at home. What else you will need:
- wooden base-podium;
- carpet or twine (jute thread);
- construction stapler and staples for it;
- fabric for the podium;
- filling for the pipe (construction foam, heavy wooden beam).
Step-by-step instruction:
- Cover a wooden square podium with velvety fabric and use a stapler on the floor side to secure the fabric with staples;
- Cover the column with carpet or wrap it with jute;
- Fill the hollow pipe with construction foam or weigh it down with timber;
- Secure the pipe with a self-tapping screw exactly in the middle of the podium;
- Mask the top of the column with a pre-made “cap”;
- You should hang the ball on a long string.
The scratching post is ready!
Basic rules for reliable installation
An important requirement for any scratching post is its correct fastening. A scratching post with your own hands must support the weight of the cat, and not tip over, and have a stable base. If the fastening is weak, the animal will be able to knock it over, this may lead to the fact that the pet will begin to be afraid of it and after this incident will not use it.
The base must be calculated taking into account the height and body weight of the animal.
There are a few tricks to getting your cat to like this new piece of furniture. To do this, it is recommended to treat the jute rope for the scratching post with mint or catnip leaves. It should not be treated with valerian.
Most cats prefer to sharpen their claws in the morning, so it is better to place it near their sleeping place (ideally, make a bed or house equipped with a post with a jute winding). If possible, it is recommended to place a new scratching post in those places where the cat was accustomed to sharpening its claws before its appearance.
To make it clear how to make a scratching post on your own at home, you can watch a video of making a scratching post.
What to consider when making
Before choosing a scheme and method for making a scratching post, you need to take into account, calculate, decide in advance on the size of the product, shape, what material to choose, place for placement and the further possibility of repairing the scratching post.
Size matters
The principle here is that the more, the better. The design should not be smaller than a cat. Even if you do a fight for a kitten, it should still be high, because the baby will soon grow up. A cat will simply not be interested in or comfortable with a small scratcher, because she likes to reach higher and further away.
If a floor structure is planned, the animal must fit completely on it (with front and hind legs). If it’s a vertical post or wall, make such a calculation so that the cat can accurately reach with its front paws and still have a little space left.
Base material
When choosing a material, it is better to give preference to natural wood or cardboard. These are soft enough materials that your pet won’t be able to injure their claws when sharpening. But it is permissible to use chipboard, fiberboard, and plastic sewer pipes, especially when it comes to the construction of an entire play complex.
Coating and winding material
For covering scratching posts, carpet and carpet fabric have the best qualities. It is recommended to purchase carpet for home use only. Office ones, as well as very cheap ones, are made on a rubber basis, can smell unpleasant, and be unsafe for the animal.
It is better not to use artificial fur or fabric, as they are short-lived, and fur tends to accumulate static electricity. The cat will be afraid of this design.
Jute (hemp) rope is made from industrial hemp, so it is safe for your pet even if swallowed.
Also, its advantages are that it is cheap, soft, and a good option for kittens. Disadvantages - when used, debris flies from jute, as it peels off into fibers. I'll have to clean more often.
Sisal rope is also made from a plant base (agave) and is not harmful to the animal. It is strong, but, like jute, it leaves behind debris. Another disadvantage of sisal is that during use by a cat, the scratching post can sag and become wet.
Cotton rope is also used to make scratching posts. It is reliable, safe, and due to the white color of the rope it gives the product more aesthetics.
Which of the presented options is better, each owner decides for himself.
Installation type and shape
Determined based on the size of the apartment and the availability of free space. Because you can make a nail sharpener in the form of a column or a floor-mounted horizontal one, or you can mount it on the corner of a wall.
Form – the simpler the better. The fewer corners and protrusions, the less the risk that the cat will damage its claws. This design is easier to repair when the coating fails.
Frequent errors in manufacturing and assembly
- Often, when making a scratching post, some mistakes are made, the most basic of which are insufficient stability, incorrect materials, ill-conceived design.
- Any structure must be balanced and securely screwed. If it falls, the cat will get scared and stop using it.
- Purchasing the cheapest ready-made scratching posts. For their manufacture, the most fragile, low-quality materials are used, which, with frequent use, quickly become unusable. Such products can lead to injury to the cat, its paws, and claws.
- The owner thinks that the cat itself should understand the purpose of this new object. She needs to be taught, shown what the animal should do with her, and to interest the pet in every possible way.
- Wrong sizes. When developing drawings and diagrams, the owner does not take into account the size of his animal, its habits, habits, and character. The pet may simply not like such an item, and sometimes it does not correspond to its dimensions or weight.
A house for a Maine Coon should be larger than, for example, a house for a British or other breed.
The animal cannot use it comfortably. It is easier to train a small kitten than an adult who is used to sharpening her claws elsewhere. Such an animal must get used to new furniture gradually.
Why cats need toys
A cat is a predatory animal by nature, which needs to constantly move and hunt for prey. Therefore, active games are not only entertainment, but also a necessity of life. Many owners, due to their busy lives, cannot constantly entertain their furry pet. In this case, you should purchase appropriate gaming products that will help your pet occupy himself independently for some time.
If the cat is left alone, its leisure time should be occupied with various toys.
The main reasons for purchasing cat toys:
- maintain good physical shape of the animal - during games, muscles are strengthened and blood circulation improves;
- satisfy “predatory” instincts;
- protect the house from the pranks of a bored pet;
- help an animal left alone get rid of depression;
- promotes cat mental activity;
- help curb aggression towards another pet living in the neighborhood;
- Strengthens the relationship between cat and owner.
The role of toys in a kitten's life
It is very difficult for a kitten, separated from its mother and the noisy company of brothers and sisters, to adapt to an unfamiliar environment. Toys will help the baby survive stress and get used to the new home and its inhabitants. At the age of three to four months, your pet’s teeth begin to change. During this period, the kitten needs to constantly chew on something. Properly selected toys will help the little creature dull the pain when changing baby teeth.
The owner should periodically change the kitten’s toys and take part in joint games.
The toy helps the kitten:
- adapt faster to a new environment;
- experience stress after breaking up with your mother;
- develop faster physically;
- gain experience and become familiar with the environment;
- sharpen growing claws;
- remove plaque and massage the gums when changing teeth;
- during joint games, establish close contact between the owner and the pet;
- quickly get used to other animals living in this house.
A kitten, like a child, quickly gets bored with the same toy. The owner needs to periodically delight the baby with new products and participate in joint games.
My cat Cecilia, at the age of two months, fell in love with a yellow rubber duck. Even, most likely, not a duck, but some kind of hybrid of a duck and a swan, because the toy had a long swan neck. The duck was almost the same size as little Tsilya, but this did not bother the cat at all. She slept with this toy and dragged it to the feeding trough. Often the duck was lying around in a bowl of water, and sometimes it was forgotten near the tray. The love continued for some time, and when Tsili’s teeth began to change, my cat simply gnawed the neck of her spiritual affection. Our Cicily has some kind of unhealthy love for rubber products, so to prevent the duck from being gradually eaten, we had to eliminate it from the cat. The swan duck was replaced with chewy sausages and happily forgotten. By the way, Tsilya still loves these sausages to bits.
Photo gallery
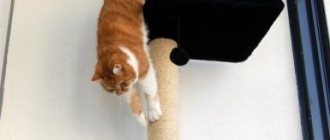
Photo 1. Scratching post with a cat resting on top Photo 2. Small cone-shaped scratching posts Photo 3. Corner scratching post
Where to begin?
Before you start work, you need to decide on the dimensions and shape of the product. If the DIY cat shelves for the wall are intended only for the pet, the task is greatly simplified. The shelf can be made from natural wood or chipboard. In the latter case, you don’t have to do anything special. They will cut the sheet for you and glue the edge where you purchased the chipboard. All that remains is to connect the parts using confirmations and hang them on the wall.
Important! This option has one drawback - the material is sold in sheets, so there will be a lot of waste, and the costs will be high.
If you make wooden shelves for cats with your own hands, then you will take as much material as you need, and the consumption will be much more rational:
- Cut the board into pieces of the required length.
- Connect the parts with self-tapping screws, confirmats, or use special wood glue.
- After the structure is assembled, varnish or paint it so that the shelf fits into the interior.
- You can hang the finished product on the wall using dowels or brackets.
- A hanging ladder can be made from furniture slats, cut into pieces of various lengths, and ordinary rope.
Important! To ensure that the lamella pieces are at the same distance, you can tie knots in the rope or use large beads and nuts as limiters.
How to train your pet to sharpen its claws in a certain place?
Building a special “pedicure room” is only half the battle. It is also necessary to teach the animal to use this device for its intended purpose, and not to damage the furniture and walls of the room. The following tips will help you do this:
- It is necessary to place or hang on the structure some kind of toy that the animal likes to play with. The cat will reach for it and accidentally touch the structure with its claws. Most likely, he will like this method of caring for his claws.
- You can show your pet how to use the device by scratching the surface with your nails in a place where it will be convenient for the animal to do it.
- You need to rub any strange cat with a clean cloth, and then thoroughly clean the surface of the scratcher with it. The device will smell like a stranger, which cats don’t like. The pet will try to destroy it. To do this, he will rub against the pillars of the structure and scratch it.
If the measures taken do not help, you should turn to special sprays based on catnip and valerian. The smells of these plants attract cats; animals are simply unable to pass by the thing from which this aroma emanates.
You should not shout at the animal and punish it for not understanding where to sharpen its claws. It is better to be patient and praise your pet for every achievement. Affection and love will help train a cat and make it smart and obedient.
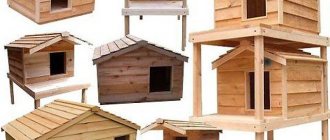
Building a house for a cat
First, let's make the house itself. To do this, take two sheets of chipboard and, having drawn a semicircle or truncated circle, cut two identical semicircles with a jigsaw or saw according to the drawing. One semicircle will be solid, and on the other we will cut out circles that imitate the footprint of a cat's paw. You can see how to do this in step-by-step photos on the Internet.
Now you need to prepare the slats, trim them so that they are the same length, and plan off any excess protrusions.
From one corner of the truncated circle, make seven marks at the same distance, so that the last one is exactly on the second corner of the semicircle of the chipboard sheet. Do the same with the other sheet. Make sure that all marks on both pieces match each other.
Now insert the prepared slats between the two truncated circles, the ends of the slats should touch the marks on the sheets. Using a screwdriver, screw the slats to the chipboard sheets around the entire circumference. Only the base of the truncated circle will remain. Now we can upholster our house with the chosen fabric. This can be done using a glue gun or fabric stapler. You can see how to properly upholster a house in a detailed master class.
Measure the resulting base of the future house and transfer the drawing to a sheet of fiberboard that was prepared for the base of our pet house. Glue a piece of foam rubber cut according to the drawing to the resulting location. This will be the cat's first bed.
Leave space on the base sheet for the pipe, which should be used as a scratching post and an additional bed for the animal should be made on top. Now you can upholster the main sheet with fabric. Make a hole in the upholstery in the same way as in the base.
Having measured the diameter of the pipe, cut a circle with an identical diameter in the sheet so that the pipe fits into the circle and stands firmly there. Next, you need to squeeze the prepared wooden blocks into the pipe. This is done so that it is possible to attach a second bench to the end of the pipe, and also to ensure greater stability of the pipe.
From two sheets of chipboard and fiberboard we cut out two semicircles of the same size. In a sheet of chipboard we cut out a circle for the pipe, and the sheet of fiberboard will remain the same.
Now you need to “put” the chipboard semicircle on the top of the pipe and secure it with hot glue. Place the second semicircle on top and attach it to the block in the pipe using a screwdriver or drill. Now you can glue a piece of foam rubber for softness and cover the second bed with fabric.
Using hot glue, wrap the rope around the pipe from top to bottom. Secure with glue or a stapler. The first scratching post is ready.
Cover the finished small board with thick fabric or wrap it with rope. Lean it against the roof of the cat house. Secure with screws at the base and on the roof. Here is the second scratching post!
Using a stapler, you can attach a rope with a ball at the end to the top bed. This will be a cat toy.
The house for the cat is ready, all that remains is to determine the place where your pet’s kingdom will be located in the apartment.
