Unlike most other cat breeds, Sphynx cats are not endowed with thick hair: they have a little hair on the tail, paws, and in the bridge of the nose. Therefore, it is more difficult for such pets to stay warm in the cold season, and they will definitely not give up their clothes.
Things can be made with your own hands from yarn, natural fabrics or various scrap materials (even from woolen socks). This way the owner will be able to warm the cat or take him for a walk in cool weather.
There are models of stylish dresses, suits and sweaters for adult cats and kittens that are easy to create if you follow the step-by-step instructions.
Preparing for work
Clothes for constantly freezing cats are not a luxury at all. Sphinxes that do not experience cold move normally and are not at risk of physical inactivity.
In order to make a cat outfit, there are some requirements that apply to clothing for Sphynx cats:
- should have a simple cut and a minimum number of seams;
- be comfortable;
- be distinguished by a small number of items in the costume;
- fabrics should be predominantly natural.
Important! Due to frequent washing and cleaning, pet clothing should not quickly lose its appearance.
Material selection
Costumes made from fabrics purchased for this purpose look great on sphinxes. But no less attractive are the outfits made from the owners’ old sweaters. In order not to injure the skin of pets, choose fabrics that do not accumulate static electricity during friction.
In order to understand whether the capricious Sphynx will like the fabric, you need to wash it with an odorless detergent, dry it and place it on the cat’s bed. If there are no incidents, then you can sew clothes from it.
Taking measurements
The construction of any pattern begins with taking measurements. You will need a special measuring tape to measure three parameters:
- neck girth (NC) - measure the thickest, lower part of the neck;
- chest girth (CG) - measurement is carried out under the front legs and along the body;
- product length (DI) - measure the distance between the bases of the neck and tail.
However, the product may have a collar and sleeves. Then a number of additional measurements are carried out:
- neck length (NL) – the distance from the base of the neck to the ears;
- torso girth (TG) - measured along the lower abdomen, in front of the hind legs;
- OPL and OPL - the girth of the front and hind legs, taking into account the indicators of the widest part.
Important! When constructing a pattern, length measurements are taken in full size, and girth measurements are divided in half.
Pattern
This pattern is specially adjusted specifically for cats. We print the pattern on sheet A-4. Since not everyone can use a printer, the pattern is given in centimeters to make it easier to transfer it to paper.
Please note: the top part is 2 parts + an allowance for the fastener of 2-3 cm. The bottom part is a double part, when unfolded it creates a belly.
Universal drawing
First, draw the back, which consists of two parts. In the middle is the fold line. The holes for the neck and legs are represented by semicircular notches. The length of the product is noted, and then a drawing is made using the data obtained. The CD line indicates the distance from the front to the hind legs.
A pattern made on the fabric will allow you to adjust all sizes during fitting. Your pet's clothing should be comfortable and not interfere with its movements. Therefore, 2 or 3 cm should be added to the girth measurements obtained. Up to 1 cm is added to the seams for oblique and curly cuts, and up to 2.5 cm for side and shoulder seams.
Fabric cutting, fitting and sewing
Before cutting, the fabric needs to be washed and ironed to make sure how much it shrinks. In this case, you should definitely take this into account when sewing and select a slightly larger size than the animal needs.
The layout of the blanks is carried out on the fabric folded in half from large elements to smaller ones so that the direction of the grain thread becomes parallel to the edge of the fold.
Then do the following:
- secure the paper template with pins to the fabric and carefully trace the design;
- then cut out all the necessary parts, not forgetting the seam allowances;
- sweep them away with a bright thread and put the resulting clothes on the cat;
- If there are any problems, apply the markings necessary to correct them with chalk.
Well-fitted clothing items can be finally put together. First, fasten the upper, located on the back, and the lower, running along the stomach, halves of the suit. The seams on the sides and in the shoulder girdle are sewn with a zigzag stitch with flat overlapping stitches. The width of the armhole must be selected depending on the purpose of the item of clothing, narrowing it for a winter version of the suit, and widening it for a summer T-shirt.
Then you need to process the edges of the clothing. To do this, you can use a braid with an elastic band. It is attached from the front side with the same zigzag stitches, stretching it a little before doing so, so that the braid does not gather and compress the edges too much. This will not only prevent the edges from fraying, but will also be a nice decoration for your cat costume.
The last stage is sewing fasteners and accessories to decorate the costume. There are a large number of fasteners that you can choose from for your cat suit. There are several recommendations in this regard, but first of all it is necessary to take into account the breed of the animal.
The zipper is best for smooth-haired pets, otherwise the hair will get stuck in the mechanism. In the same way, hairs will linger on Velcro. Universal fastenings are buttons that can be placed either on the back or under the chest of the animal.
After completing all these operations, you will make a luxurious costume for your pet.
Required Items
First of all, you should equip your workplace. You will need a table free of objects, a comfortable chair, and good lighting. You will also need:
- fabric for pattern, tracing paper;
- knitting yarn, crochet hook or knitting needles;
- several types of fabrics - main, lining, finishing and insulation;
- adhesive materials necessary to strengthen various sections;
- sewing machine;
- tailor's chalk and accessories: zipper, Velcro fasteners, snaps, buttons;
- finishing braid, fringe, lace, appliqués;
- threads of different colors, needles, scissors.
Perhaps not all items on the list will be useful. But having a pattern, accessories and material, you can already start working.
Vest
Before you begin, measure your cat's waist circumference. The waist circumference is indicated on the pattern with the letter T.
If you choose wool for knitting, then opt for soft wool intended for children. You need about 50 gr. Knitting starts from the back and goes in one piece. First there is a 3 cm elastic band, then there is an armhole (by any method). We close the armhole loops on one side and knit to the end of the row. At the end, turning the work, we do the same and continue knitting to the neckline. To knit it, we make one shoulder, close the neckline by 5 cm and continue knitting for another 3 cm. We cast on loops for a 5 cm neckline and combine 2 shoulders.
Next we knit the front until the end of the work, finishing with 3 cm of elastic. Sew the side seams. We tie the neckline and armhole with a 2 cm elastic band.
Source
How to make clothes for the sphinx
You can use one pattern to sew different clothes. Fabrics that differ in quality and properties, different fittings, and finishing will provide several options. It should be taken into account that:
- home outfits should be as loose and soft as possible; it is better to sew them from old things;
- suits and overalls for walking should be made of waterproof fabrics.
Elegant dresses and suits, tuxedos for pets are made from expensive materials and jewelry is used.
Knitted sweater
Before starting work, measure the volume of the cat’s neck and the approximate length of the product. Add a couple of centimeters for a loose fit. In order to knit a sweater, you will need:
- circular and regular knitting needles No. 3.5;
- 100 g of soft wool yarn, possibly mixed with acrylic;
- sewing needle.
Note! You can knit a sweater for the sphinx using the simplest pattern, for example, in stockinette stitch. All odd rows are knitted with knit stitches, and even rows are knitted with purl stitches. Knitting is done in two threads. The first 3 cm are done with a 1x1 elastic band.
To form sleeves, 18 loops are added on both sides of the fabric. Knit about 10 cm (depending on the size of the pet) and close 21 loops in the middle. In the next row, 28 stitches are knitted above these closed loops and another 10 cm are knitted in stockinette stitch.
Close 18 loops on both sides. After another 10 cm of knitted fabric, knit an elastic band 3 cm high. And then close the remaining loops. After the side seams and sleeves are sewn, the collar is knitted. If the front of the sweater is made from two parts, you get a sweater.
Dress
Dresses for Sphynx cats will serve as a real decoration for them. It is enough to choose one pattern and different fabrics, combining which you can get an outfit for special occasions and home clothes.
Flounces are sewn to the skirt, and they are also used for sleeves. Bows and ruffles, lace frills will add originality to your pet's appearance. The main thing is that clothes that quickly become contaminated with sebum should be washed well as they are worn.
Overalls
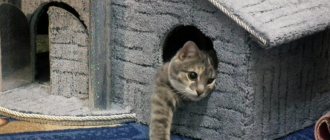
To keep sphinxes or other short-haired pets from freezing, you can sew them a soft jumpsuit made of fleece or knitwear. To prevent the seams from irritating or putting pressure on the skin, it is better to place them on the front side of the product and trim them with a beautiful braid.
The same pattern, but only in a more simplified form, with straight lines instead of curved ones, is suitable for a knitted product.
The tuxedo
Only professionals or those who have extensive experience can handle sewing such a complex garment. You need to know how to not only cut, this small thing has a rather complex finish.
A tuxedo is easier to knit. Moreover, they knit it like a sweater, adjusting the length of the product if necessary, since its front part should be much longer than the back. The butterfly can be made black, or you can deviate from accepted norms and knit it from bright colored threads.
Airy skirt
In a fluffy and bright skirt, the Sphynx cat will look charming. You can sew it quite quickly, and without using a sewing machine:
- A rectangle is cut out of organza or nylon. Its height is the length of the future product, and its width should be equal to the girth of the cat’s torso along with an increase that provides volume. If the cat is small, the height of the skirt can be 15 or 20 cm. The width is chosen individually, usually up to 150 cm.
- Using a regular sewing needle, the long side is evenly gathered onto the thread. Its length should slightly exceed the waist circumference of the sphinx.
- An elegant ribbon-belt is sewn onto a thread with gathered fabric.
Sew the sides of the rectangle as desired. They decorate the “Chopin tutu” (this is the name of the model) with bows and flowers made of the same airy and light material.
Vest without pattern
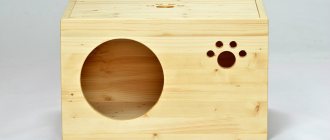
The vest doesn't even need a diagram. You'll need an old sweater. And for a small kitten, you can take a warm baby sock. The manufacturing process is as follows:
- The cut sleeve is laid out on the table with the seam down and the fold up.
- The sleeve cap will be the lower part of the vest, so it is cut in a certain way. The back should be longer, and the part related to the stomach should be shorter. Then the braid is folded or sewn.
- The seam should be at the front of the vest. The part of the sleeve or sock with the elastic should match the collar.
- In order to determine the location of the armholes, apply the blank to the pet, and then cut out ovals and process their edges.
To sew a vest from a sock, remove its toe and heel parts. Since this item is quite elastic, all that remains is to determine the length of the vest and cut out the holes for the front legs.
Insulated option for walking
If your pet needs to go for walks, the fabrics used to sew the overalls should be waterproof. And the warm lining and synthetic padding will protect it from strong winds. To ensure that such clothes do not restrict movement, the pattern should be increased, as well as seam allowances. You can knit a soft sweater from double yarn and sew a knit lining to it.
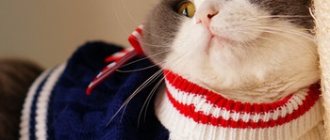
Sweater for a cat
The Sphinx is an animal that has short hair, large ears like a bat, and is not always easy-going. But those who love this breed of cat know that they need to be kept warm at all times, because they are susceptible to cold. Therefore, it is necessary to insulate your pet if it is cold in the apartment or sometimes you take it out of the house. In this master class we will learn how to knit a cute sweater for your pet. For such a small product you will have to spend a little time, but then the cat or cat will be warm and will continue to delight the household for a long time.
Before we start knitting a sweater, we need to take measurements from the cat - length of the product, belly circumference, belly and back length, neck circumference.
Then we need to create patterns, which we can then use for further products for the cat. Knitting patterns are very simple, so even a novice needlewoman can handle it.
What we need to prepare:
- white wool mixture threads;
- red acrylic threads;
- knitting needles number 3;
- a needle with a large eye.
We start knitting from the collar. To do this, we put 71 buttonholes on the knitting needles with red threads and knit an elastic band, one front and one purl, to a height of seven centimeters. Now we divide the resulting fabric into two parts, where 25 buttonholes will be the stomach, and the remaining 46 will be the back. Now we switch to white threads and begin to knit with two balls, separately for the back and separately for the tummy.
1st row: belly - we knit all the buttonholes with knit stitches, while making 14 yarn overs evenly throughout the row. Back - we knit 23 buttonholes with knit stitches, then one yarn over and again with 23 knit stitches.
2nd row: we knit all the buttonholes purl on the back – that’s 47 stitches. Belly – 39 stitches are knitted with an elastic band one after another.
3rd row: tummy - remove the buttonhole, one yarn over, then again elastic 37 loops, and again yarn over and knit; back - remove, yarn over, knit 45, yarn over, knit. 4th row: back - purl everything; tummy - 41 buttonholes are knitted with an elastic band one after another. 5th row and 10th row: we knit the same way as the 3rd and 4th.
From the 11th row we begin to form armholes: tummy - close 3 buttonholes and knit 41 loops with an elastic band; back - close three buttonholes, purl the remaining 52 buttonholes. 12th row: back - close three buttonholes and purl the remaining 49; close three buttonholes, and then knit 41 loops with an elastic band. 13th row to 27th: we knit taking into account the pattern.
28th row: belly – you need to pick up three air stitches and then knit taking into account the pattern; back - three air and again taking into account the pattern.