Postoperative care is the most important aspect of sterilization of cats, since after the operation all care for the animal rests with the owners. The most pressing question for many remains how long to wear a blanket after sterilizing a cat. The main problem is that animals refuse to wear a protective bandage and try with all their might to free themselves from it. Looking at the suffering of their pets, the owners try to remove the bandage early, without even realizing that such a decision is not always the right one.
When can you remove the blanket?
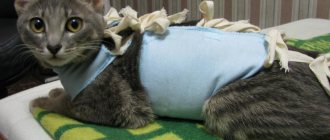
A bandage (blanket) tied on the back is used to protect the sutures on the abdomen placed in the clinic during surgery.
The healing period of the suture is extremely important for the future health of the cat.
Sometimes it is possible to remove the blanket from a cat after sterilization already on the second day after the operation, but if emergency situations arise, the period of wearing the bandage can increase to 10 days or more.
The main problem when wearing a protective device can be considered that the tailed pet protests with all his might against putting it on , tries to get rid of it, seems very unhappy, which causes the owner a natural desire to make the cat’s life easier. But there are a number of nuances that affect the period of wearing the bandage.
Care: first week day by day
Day 1
After surgery, the cat sleeps an additional 30 minutes to 1-1.5 hours. On the first day the cat is sleepy and lethargic. There is a lack of coordination of movements. There may be hallucinations. Do not give any drugs that speed up recovery from anesthesia without the consent of your veterinarian! For the first 24 hours, you need to be nearby, pet the animal, hold it in your arms, and observe. When leaving, it is better to leave the cat in a small enclosed space and on the floor to avoid it falling and leaving in an unknown direction. Do not provide food or water - there is no need to feed the baby at all during the first day; you need to give it drips from a syringe or pipette.
If there is no blinking, close the cat's eyes yourself to prevent the cornea from drying out. Do this before you start blinking on your own.
On the first day, the animal is disoriented - it can run away in an unknown direction, stop abruptly, run into walls, meow, fall and fall asleep, jump up, etc. There is no need to be afraid. It is better to place your pet in a non-passable room so that no one or anything can disturb it. Possible involuntary urination. If your cat goes to the toilet on her own, you can support her by placing a full-width towel under her belly for stability and additional bowel stimulation.
There is vomiting. The first sign of gagging is excessive licking of the face. You should not bathe until the stitch heals.
If the cat is in pain, it needs an anesthetic injection, previously prescribed by a veterinarian.
Day 2
The cat gradually comes to its senses and becomes more adequate. You can put water near it and start feeding it a little. The food starts with low-fat chicken broth or kefir with bifidobacteria. Do not overfeed under any circumstances, but give all food in small portions. Only water should be freely available and in plenty! Even if before the operation the cat was only on dry food, you should not start with it - it is better to replace it with similar “wet” ones.
If the animal moves little and the paws are cool, you need to rub them or put the cat on a warm heating pad, promptly removing the cold one. On the second day, she can hide from prying eyes - you must make sure that the animal is always in sight. If you are allowed to hide, then in places where you can easily get it.
The cat's toilet should be somewhere nearby so as not to bother the animal with unnecessary walking after surgery.
If a cat does not walk at all after sterilization, then there are two reasons: the animal is uncomfortable in the bandage or there are problems with the hind limbs after anesthesia (especially after epidural anesthesia). The exact cause will be determined by a veterinarian who can be invited to your home.
Continue to monitor behavior, appetite, urination, bowel movements (should have already appeared) and general condition.
Usually the pain goes away on the second day. If there are still signs of discomfort due to pain, a painkiller is given or injected.
Day 3
On the 3rd day, the cat should fully come to its senses: show activity and interest in what is happening, go to its litter box and start asking for food. You can gradually switch to a regular diet, but the ban on overfeeding remains.
On this day, it is necessary to measure your body temperature. Body temperature is measured rectally (in the rectum) with the tip of a thermometer lubricated with Vaseline or any greasy cream. If the temperature is elevated by two measurements during the day, you need to contact your veterinarian - you may have to start taking antibiotics. The course will have to be completed in full, regardless of which day the temperature drops to normal.
If the temperature does not begin to decrease from antibiotics, you need to take the cat to a veterinarian or call him at home - there is a risk that the infection is viral, and this is a risk of death of the animal due to post-operative weakness.
Also a reason to contact a veterinarian if the body temperature is below 37.5°C.
If there is no bowel movement, you can give mild laxatives based on lactulose (Lactusan, Duphalac). The intestines must be emptied regularly - this must be monitored, because... very often after anesthesia there is a slowdown in intestinal motility.
Day 4
By the fourth day, the animal should actively and independently eat and drink, active urination and bowel movements should be noted.
If there is no urination, you need to give 1/5 tablet of no-shpa or 2-3 drops of valerian tincture diluted in a teaspoon of water. After 15 minutes, do a light abdominal massage at the level of the bladder. Urination should appear. If still not, the cat needs to be taken to a veterinary hospital for bladder catheterization.
Day 5
By the fifth day, you can start letting the cat out of the closed room, because... She can be allowed some activity - walk relatively long distances (between rooms); she can be allowed to walk in the yard (under supervision) if the animal had access to the street before sterilization. You can jump on low surfaces.
By the fifth day, the swelling and redness around the suture should subside, if there were any such signs. Signs of scarring should appear.
Day 6 and 7
The only reminders that the cat has undergone surgery are the blanket (bandage) and the presence of postoperative sutures. By the end of the week, the animal should be fully active, eat with appetite, drink when it wants, sleep in any chosen place, jumping onto the sofa or chairs (it is, of course, still difficult to jump onto the windowsill from the floor).
No pain. Urinate and have bowel movements as usual. If the body's resistance is normal, the sutures can be removed on the 7th day - maximum on the 10th.
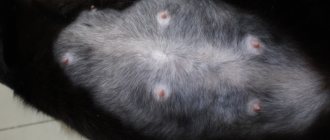
The suture after sterilization of a cat should be clean, dry, with signs of dense scarring, without signs of inflammation or suppuration.
What affects the duration of wearing a blanket?
The number of days directly depends on the method in which the postoperative sutures were processed.
Types of processing:
- Using a protective spray. This method of treating a postoperative suture protects the wound from the development of inflammatory processes, accelerates the healing process, has a beneficial effect on overall well-being, and reduces the period of wearing protection to 7 days.
- Without using protective spray. In this case, we are talking about a time interval from a week to 10 days, it all depends on the condition of the animal and the speed of healing of the skin.
Be sure to read:
Complications after castration of a cat: causes, types, symptoms and treatment, when you need to see a doctor
The protective bandage is made from natural fabrics (cotton), does not irritate the animal’s skin, does not allow the cat to lick the wound, protects against inflammation of the seam, but causes some discomfort to the pet.
Your furry pet may notice changes in behavior or gait, but as soon as the protection is removed, everything will be restored.
Important! Many owners independently decide when to remove the blanket after surgery, based on the fact that the cat is hampered by the protective bandage. If the bandage is removed without the advice of a veterinarian, it is necessary to constantly monitor the pet. You can use a special collar that will prevent the animal from licking the seam.
Buy or make it yourself
When the need for a postoperative blanket arises, the owner is faced with a choice: purchase the product in a store or make it himself. Each option has its pros and cons.
Advantages of factory products:
- made in compliance with all standards, from environmentally friendly materials;
- high quality, have sufficient strength, the ties do not come off, the edges do not fray;
- special medical breathable fabrics are used for production;
- the design of the blanket fully corresponds to the anatomical structure of the cat;
- Convenient Velcro fasteners are often found.
Pros of homemade blankets:
- a bandage tailored to the animal’s individual measurements will fit perfectly and be more comfortable;
- using a pattern made once, you can sew the required number of replacement bandages;
- Considering that a blanket can be made from scrap materials or sewn from old clothes, it will not require material costs.
Expert opinion
Irgutanova Nina Nikolaevna
Practicing veterinarian, 13 years of experience.
Considering the low cost of ready-made blankets, you can purchase one, and then compare it with a homemade one in terms of convenience for the cat, and after that choose the most suitable option. Moreover, in almost all clinics the cost of the operation already includes at least one bandage.
When is it possible to remove the protective device early?
The protective bandage is made from natural fabrics (cotton) and does not irritate the animal’s skin
. Early removal is possible if:
- the surgical intervention was carried out using laparoscopy: in this case, the wound is so small that protection is not required;
- when performing sterilization, the surgeon used absorbable suture material and protective sprays to treat the wound;
- Four days after the operation, the cat has a normal body temperature, there is no bleeding, redness of the suture, or suppuration.
Important! When using suture material that requires further removal, you should not remove the bandage ahead of time, even if it causes discomfort to the animal.
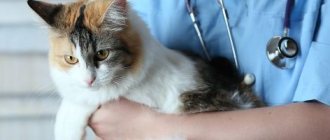
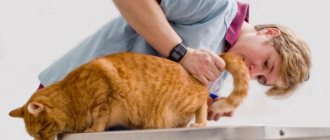
After examining your pet, the doctor may recommend getting rid of the protective accessory ahead of schedule if:
- aggression is clearly expressed, the animal continuously tears off and gnaws the blanket;
- the animal is afraid to walk in a bandage;
- ulcerations appeared under the places where the tissue puts maximum pressure on the body;
- the bandage became very dirty due to eating and visiting the toilet.
Observation after removal of the bandage
After the bandage is removed, it is necessary to carefully monitor the cat's condition in the first days. The cat family is characterized by increased cleanliness, therefore, at first the animal will constantly lick the seam.
The owner must ensure that the cat does not chew the edges of the healed wound.
Be sure to read:
A cat has a lump on her stomach after sterilization: reasons for the appearance of ours and under the suture, what to do, prevention
Important points during inspection:
- monitor the integrity of the edges of the wound surface;
- control whether there is any discharge from the wound in the form of blood or lymph;
- inspect the seam for redness, inflammation, and the appearance of purulent discharge;
- check whether nodes or swellings have appeared along the edges of the wound surface.
Any of the identified anomalies is a reason for an unscheduled visit to the veterinarian.
How to properly and safely tie a blanket on a cat after sterilization
To make it comfortable for your cat to wear a bandage, you need to learn how to tie it correctly. First of all, you need to lay your furry pet on its side, bring the edges of the bandage together and, starting from the top point, tie it with ties.
For better fastening of the blanket, the second garters are tied diagonally with the third. The penultimate and last ties are also tied using the crosswise method. The blanket should not dangle too much or squeeze the animal’s body. Ideally, your little finger should fit between the bandage and the blanket.
Processing and removal of seams
The sterilization operation is carried out under anesthesia; the owner needs not only to properly remove the animal from this state (properly contain, feed, give water), but also take care of the cleanliness of the wound.
The procedure for treating sutures begins on the third day after sterilization
The procedure for treating sutures begins on the third day after sterilization, at intervals of 2 times a day.
Algorithm of actions:
- Calm the beast, remove the bandage.
- Use a cotton swab soaked in an antiseptic (without alcohol) to generously moisten the wound surface with gentle movements.
- Remove hairs and dried blood.
- Inspect for inflammatory processes.
- Put on a bandage.
Attention! In some cases, to speed up healing, cat owners apply iodine or brilliant green to the stitches. It is strictly not recommended to do this: the drugs dry out the edges of the wound, inhibit recovery processes, and can lead to chemical burns of the skin.
Literature
- Belyaev A.N., Kozlov S.A., Taratykov I.B., Novikov E.I. Patient care in a surgical clinic: textbook. allowance. – Saransk: Mordovian University Publishing House, 2003. – 136 p.
- Buyanov V. M. Egiev V. N. Udotov O. A. Surgical suture. – M.: Antis, 2000. – 92 p.
- Zoltan J. Operating technique and conditions for optimal wound healing. – Budapest: Publishing House of the Academy of Sciences of Hungary, 1983. – 175 p.
- Mironova E. N. Fundamentals of physical rehabilitation. – M.: MOO “Academy of Safety and Survival”, 2016 – 310 p.
- Semenov G.M., Petrishin V.L., Kovshova M.V. Surgical suture - St. Petersburg: Peter, 2001. - 256 p.
