The body of cats is usually covered with a beautiful fur coat, which becomes even thicker and warmer with the onset of cold weather. However, some representatives of the cat family do not have thick fur, so they need additional insulation. You can warm your cat without causing her discomfort using special clothing.
The cat suit has a simple cut, so sewing it does not require much tailoring skill. Do-it-yourself outfits will cost much less than ready-made analogues. How to correctly take measurements and make a pattern for clothes for a cat? What materials and tools will be needed for sewing?
Taking the necessary measurements
To make it yourself, you need to start by drawing a pattern of clothes for cats, and before that, take measurements. There are three main measures:
- the circumference of the animal's neck;
- back length from neck to tail;
- body girth (measured behind the front legs).
Having three measurements, you can sew a blanket, sleeveless jacket or a simple sweater for an animal. To create complex models, you will need to measure the abdominal circumference, the length of the abdomen from the neck to the hind legs, the distance between the front legs, and the shoulder circumference.
Using these measurements, you can create any pattern for cat outfits. Do-it-yourself knitted clothing for cats is somewhat simpler to make; it can be adjusted directly on the animal, making intermediate fittings. Experienced knitters will have no difficulty knitting a sweater for a pet without taking measurements.
You need to take measurements from a cat when he is in a calm state, standing on all fours.
Who needs a suit
Nature has taken care of the comfort and warmth of most cat breeds.
Even before birth, animals acquire a soft and durable coat that performs essential functions. This includes thermoregulation and protection from wind, moisture and other weather conditions. But certain breeds are less fortunate in this regard. This is especially true for artificially bred ones, whose fur is presented in the form of a barely noticeable fluff. These breeds are completely devoid of even minimal “plumage”. From a hygiene point of view, the creation of hairless breeds has become a lifesaver for people suffering from allergies. However, the cats themselves had to pay for the hypoallergenicity. Their body temperature is most often elevated, and the animals themselves are constantly looking for somewhere to warm up. A way out and salvation for freezing animals will be clothing for cats, which you can sew with your own hands.
What breeds will need clothing:
- Sphinx;
Sphinx
- Devon Rex;
Devon Rex
- Bambino;
Bambino
- Peterbald;
Peterbald
- Levka.
Levkoy
Woolen pets do not need clothing. However, some owners prefer to dress up their pets in interesting costumes. Well, if the outfit doesn’t bother the cat herself, then why not?
Preparing the pattern
The simplest pattern is a trapezoid with rounded edges and holes for the front legs. To build it, you will need the length of the back, the girth of the neck, chest, and the distance between the forelimbs. The comfort of the animal’s movements depends on the latter, so special attention should be paid to the measurement.
When creating a pattern for clothing for cats, you must take into account seam allowances and fastenings. The outfit should not be too tight on the animal’s body or restrict movement. This will bring discomfort and harm to the cat’s health, since tight clothing will worsen blood circulation and lymph flow.
A more complex pattern consists of two parts, suitable for constructing a variety of models of dresses, blouses, jackets, and other clothing. The upper part covers the back and sides of the pet, the lower part covers the belly. To create such a pattern, you should measure the length of the back, abdomen, chest circumference, waist, distance between the legs, and neck circumference. It can be supplemented with sleeves, a hood, and other details.
The most complex pattern design is needed for sewing overalls for walking outside in cold weather. It includes sleeves and "pants" for the animal, the back and belly are completely covered, and a hood is often added. Sleeves are usually made loose, with elastic at the bottom edge, so the main measurements are the length of the back and the girth of the animal's body - in the chest and abdomen. You also need to provide a hole for the tail.
Model description
Lightweight vest for girls made of jersey and fleece, lined, zipped, with a hood, kangaroo pockets and an appliqué on the back.
The vest consists of three types of fabric:
- shelves and hood made of woolen jersey;
- viscose jersey lining;
- fleece back.
This vest is very warm, and at the same time does not increase the volume. In winter it can be worn under a jacket, in autumn or spring with a warm jacket, in summer with a blouse or top. All fabrics are of high quality, namely on the shelves and the hood are natural, which eliminates allergies. Read more about the properties of natural fabrics here.
Why is the shelf and hood lined? The bright lining in a children's vest serves not only for the sake of beauty, but also for convenience. The knitwear on the shelves and hood consists of wool fiber; such fabric is itchy and unpleasant to the body. To avoid the discomfort of children's delicate skin, I decided to make a lining from thin knitwear.
This way the vest will keep your body warm and comfortable. In addition, the thickness of the shelves will be equal to the back, since fleece is much denser. You can learn about the properties of fleece fabric from my master class: how to sew a sports jacket.
I did not put a lining on the back, this will create additional thickening. The softness of unlined fleece provides a pleasant, comfortable feeling. By the way, not a penny was spent on the vest; all the fabric was left over from sewing the cardigan, tunic and hat.
I was lucky, the lightning also turned out to be from leftovers. Let me tell you a little secret: when I have excess zipper, I don’t throw it away. I just select the desired slider number, and voila, the new zipper is ready.
Sewing and fitting
The paper pattern is transferred to the fabric, secured well with pins. The parts are cut with seam allowance. Then you need to sweep them off first and be sure to try them on your pet. This allows you to timely detect and correct any shortcomings in the sphinxes’ clothing scheme. After making changes, the parts need to be swept away and tried on again. And so on until the outfit fits perfectly.
The fitted parts of the suit are sewn by machine or by hand. The edges of loose fabrics should be pre-overlocked or treated with any overcast seam. First, the upper and lower parts of the suit are sewn together, then small details are sewn on. There should not be too many of them, and it is also worth excluding sharp, small decorations that the cat can get hurt on, chew off or swallow. It is recommended to add elastic band around the edges for winter options. Before adding the finishing touches and sewing on decorations, you should do one more fitting.
Before cutting and sewing, wash the fabric and iron it with a hot iron. This will help assess the degree of shrinkage.
How to sew a bean bag for a cat
Designers always delight cat owners with new ideas, but they keep the patterns secret. Look at what an interesting cat bed - with ears and a tail, in the shape of a Cat.
Our free pattern will fit a medium size cat, but if your pet is larger than an average cat, increase the length of the pattern. The width should be enough for comfortable sleep. What to make a cat bed from with your own hands: natural fabrics are preferable.
The photo shows faux fur, but it’s better to take fabric from an old terry robe, or a couple of terry towels, denim, linen, or knitwear. Denim fabric will make, if not a bag, then a good mattress for a cat. Artificial fabrics, such as fleece, microfiber, flock, retain fat, sweat, moisture and do not “breathe”.
We also need foam rubber - it is needed for the lapel. The pattern has 1 cardboard piece 160 cm long. It is inserted inside the lining so that the sleeping bag is not so flat, but this is at your discretion - you don’t have to insert cardboard.
To work you will need:
- 2 main parts 58/48 cm each, for the lapel – 100/20 cm, for the ears and tail.
- 2 pieces of lining material, 58/48 cm each.
- Foam rubber for lapel – 100/10 cm.
- Threads, scissors, needle.
- Filling for stuffing the underside, ears and tail.
- Tailor's pins.
The pattern is given without seam allowances! A sewing machine is not necessary, but it will make it faster.
We measure out the required dimensions on paper, or directly on the wrong side of the fabric. Don't forget to add an allowance of 0.5-0.7 cm to the patterns.
We will start our master class with stitching together small parts. Take 4 ear pieces, fold them front to back in pairs and sew. Do not sew the bottom of the ears. Turn it out. The tail part can be made not as pointed as in the pattern; round both ends. Fold the tail piece in half and place it wrong side up.
Sew the side seam, leaving an unsewn section for stuffing, and turn it right side out. We stuff the filling inside - we need the ears and tail to be voluminous. We sew up the open edges through which we stuffed with a hidden seam.
Next, we take foam rubber (if there is no foam rubber, you can simply sew the lapel and fill it tightly with filler). We sew 20 cm of the lapel, we get a continuous part. We put the foam rubber on the wrong side of the lapel and sew it up with an “over the edge” seam. We got a “donut”.
Next, we will make the main sleeping bag. To do this, we fold 2 parts of the lining face to face and sew along the edge, retreating 0.7-1 cm. Turn it inside out. We fold the 2 main parts face to face, place the finished tail in the middle, and pin it together. Make sure that the tail is at the same distance from the edges. Sew along the wrong side, retreating 0.5 cm from the edge.
We got 2 bags - from the lining and from the main fabric. Place the lining bag into the main fabric bag, match the seams, and pin together. The seam is sewn at a distance of 0.7 cm from the edge, leaving 7 cm unstitched for turning inside out. We turn our sleeping bag inside out.
All that remains is to sew on the lapel. Find the middle of the finished lapel and mark the point with a pin. We place the ears at the same distance from this point. We pin it with pins. We sew the bag to the lapel with neat small stitches, including the ears. The master class is over. You can sew a small mattress for the bed and stuff it too.
On the video - how to make a cat bed from a sweater, master class:
DIY cat bed
Watch this video on YouTube
Creation technology depending on the type of clothing
You can create almost any clothing that people wear for cats. However, the main requirement here is that it must first of all be warm, comfortable for the animal, and only then beautiful. The most popular model options are a sweater, a blanket and a dress.
Sweater
A sweater is a universal garment. Thin options are suitable for warmer weather, thick ones for frosty winters. We sew such a garment from soft knitwear or knit it from natural yarn. The main thing is that in hairless cats the seams should be as smooth as possible, and the yarn should in no case be scratchy.
A simple way to make a sweater for the sphinx with your own hands is to sew it from socks. Even a person far from sewing and knitting can cope with this. All you need to do is take a sock, knee socks or pant leg from knitted leg warmers of a suitable size, cut to the desired length, and make holes for the front legs. Then finish the seams and decorate if necessary – warm clothes for your pet are ready. Separately, you can cut out sleeves from the same sock and carefully sew them into the armhole.
blanket
The only thing simpler than a sweater made from socks is a blanket. It is a cape with slots for paws. Made from lightweight fabric, it will help the cat not overheat in the sun, and made from denser materials, it will not freeze in winter.
Its peculiarity is that the distance between the front legs is not important here, since it does not fasten or close on the stomach. Therefore, the main measurements will be the back length, chest and neck circumferences. This type of clothing is usually tied at the neck.
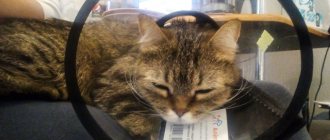
But this is a decorative blanket. A completely different piece of clothing is a postoperative blanket. It is necessary to prevent the animal from touching or scratching the stitches after surgery. It is a design that covers the stomach and is tied or fastened on the back in several places. To prevent the blanket from slipping, slots are made in it for the front legs for better fixation.
Dress
The dress is already decorative cat clothing. However, it can also be useful and warm. For example, if you attach an openwork short skirt with a crochet to a knitted sleeveless vest or a sweater made from a sock. Such knitted clothes on cats will not only look cute, but also keep the animal warm.
Well, in general, a dress, be it sewn or knitted, in most cases is a sleeveless vest, made according to the simplest pattern, with a skirt attached to it. It is usually fastened at the back. Zipper and Velcro are options for hairless breeds; for the rest, buttons or ties are suitable.
As for decorations, everything depends on the owner’s imagination. The main thing is that they are all safe. After all, even in the pursuit of beauty, you should not forget about the health and comfort of your pet.
Cute summer t-shirt
In the summer, a beautiful, stylish T-shirt will be ideal for your smooth-haired cat - but this model is most suitable for sphinxes, whose skin needs to be protected from direct sunlight. How to make a T-shirt for a cat with your own hands? First, prepare a light fabric, use knitted options. Draw the diagram yourself or print it out, cut it out and draw it onto fabric. Then proceed according to the instructions:
Step 1. As in the previous version, the GZ line is the length of the cat’s back. Fold the back (part 1) in two layers, cut it out, bending along the dotted line. Remember that the product should not interfere with the animal’s movement - if the cat is well-fed, make the pattern a little wider. Also cut out the belly (part 2) with a fold along the IZ line.
Step 2. Place the two parts together and sew along the lines BVD, AG. Use a zig zag stitch. Leave the lower part of the product, as well as the sleeves and neckline as is, but if necessary, the lower part and sleeves can be hemmed.
What will be needed for production?
To make clothes for a cat you will need a standard sewing kit. Fabric, needles, threads, scissors, decorative elements, elastic bands, buttons and zippers. To measure the dimensions you will need a measuring tape. With a sewing machine and overlocker things will go faster. To knit products you will need yarn, a hook or knitting needles suitable for the thickness of the yarn. To sew a costume for a cat, use patterns, transferring them to tracing paper. Below is a selection of different types of cat clothes. To outline the pattern on the fabric, use soap remnants.
Zippers are best used on clothes for smooth-haired breeds. For other cats with medium and long hair, it is more convenient to use Velcro or buttons.
Which fabric to choose?
If you want to make clothes for your cat yourself, use natural fabrics with no electrostatic effect.
100% cotton does not cause allergies, has good performance properties, practically does not shrink, can be boiled, and does not fade.
Viscose has the same properties as cotton. In addition, it is elastic, stretches well, and does not lose its shape. But it has restrictions on the water temperature when washing.
100% wool warms well and, with proper care, does not shrink or shed. Not suitable for sensitive skin due to tartness. If you want to use a woolen product, it is better to choose mixed fabrics - 70% wool, 30% viscose.
Polyester fabrics are soft, elastic, retain heat well, but can accumulate electrostatic voltage, which cats, especially long-haired ones, will not like. Using special treatment for artificial fabrics, it is possible to get rid of the electrical effect.